Paper Mario: Sticker Star: All Chapters RANKED!

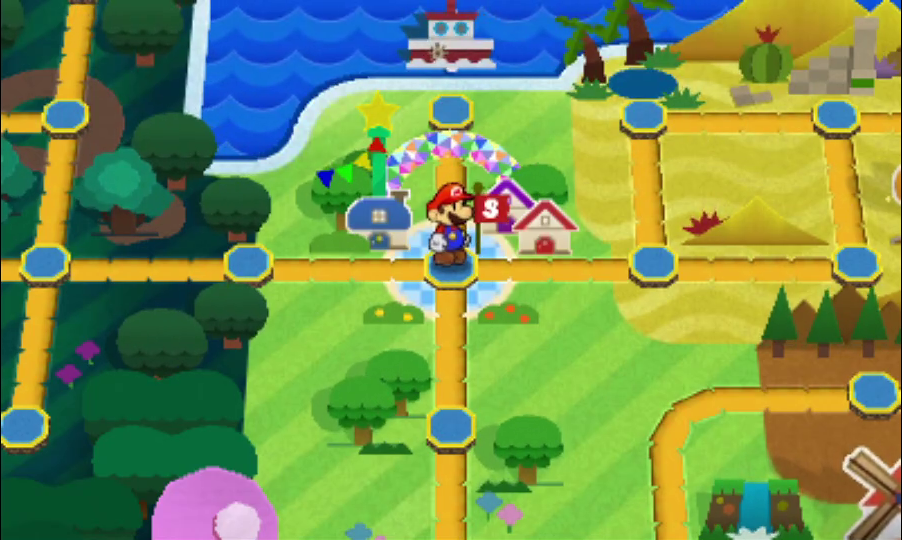
I don't give a cran if they aren't actually called chapters in this game, I think it sounds better than "worlds." Some people hate this game, but honestly, I think it's a very good, fun, and unique game. Just because it isn't a carbon copy of TTYD doesn't mean that it isn't a good Paper Mario game, that means that you need to learn that different doesn't always mean bad.
#6 - Chapter 6
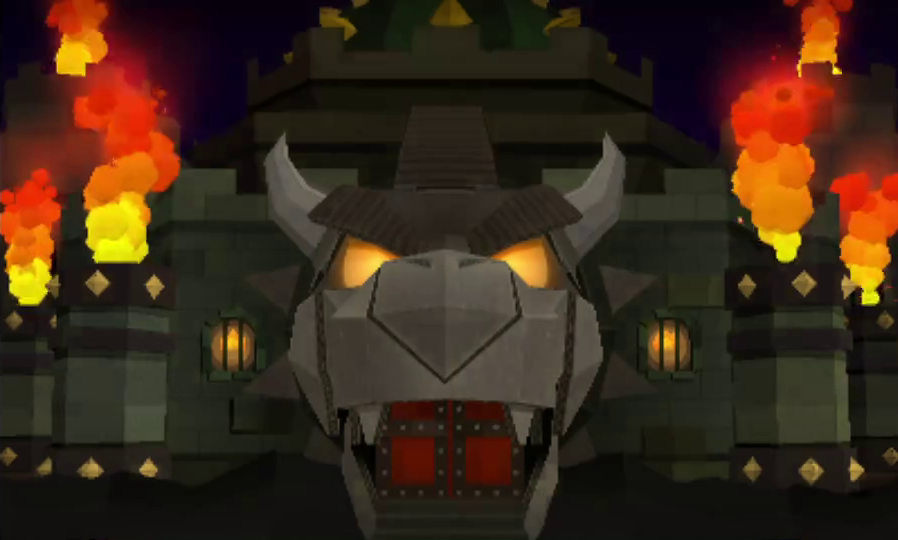
There is one glaringly obvious problem with Chapter 6: there's only one full level here. Yes, you heard me right, one. The first "level" is Gate Cliff, a barricade that stops Mario from entering until the other five Royal Stickers are stuck to the front of the Album. The only thing to be done here is paperize the floating Bowser Castle in the mountain. After the castle is revealed, Mario needs to find a way to actually reach the fortress. There is someone who can help: the newly evolved Wiggler, who is now Flutter. After hopping on Flutter and moving past the Gate Cliff toward Bowser's Sky Castle, Mario is intercepted by Bowser Jr. and his flotilla (which is actually only one ship, making the name confusing). This course is a solid one, but, as mentioned, it is the only full course in the entire world. This level holds the final stickers needed for the Sticker Museum: the Wrench, the Barrel, and the Megaflash Jump. The boss fight at the end of this great level is also a pretty solid one, as it mostly requires good timings. After taking Bowser Jr. down, the final stage awaits: Bowser's Sky Castle. In terms of epicness, this level fails to disappoint. The Kamek fight here can be quite annoying if the Battle Spinner goes on a 10AM lunch break, but it isn't painful. The only gameplay in this course other than boss fights is a short and easy, yet still fun, carpet obstacle course that leads to Bowser's chamber. Now the final boss of Sticker Star, is amazing. While I have lots of nostalgia for this fight as it was the first time in my life that I managed to take down a final boss, when I beat it earlier today, it was still awesome. While the required Things can be annoying to figure out and find, it doesn't matter if you have the... Prima official game guide! The first and second phases are actually pretty tough, and the music for the fifth phase during and after Kersti's sacrifice is excellent. The final phase can be cheesed a little bit with a Megaflash Infinijump, but still, it's great. I'll save the full explanation of this boss fight for another time, though. Overall, this world's (2) levels aren't bad, but yeah, there are only 3 levels, one of which is a cliff, one is an actual level, and the last is a boss gauntlet.
#5 - Chapter 1

Chapter 1 is a fun introduction to this game, but the lack of originality is where the problems happen. Every single Paper Mario game since the original on the Nintendo 64 has started off with a grassy world, and Sticker Star is no exception. The first course, the Warm Fuzzy Plains, gives the player a further introduction to the use of stickers after the battle at Decalburg, the first Thing, the Scissors, a mini-boss (although very easy), and the Paperization ability. After the completion of this first course, the Sticker Museum, one of my personal favorite parts about this game, becomes available to the player. Bouquet Gardens (the second level) introduces Kersti's Battle Spinner, an effective tool for boss fights, but I personally think that it makes regular encounters too easy. Two Things can be found here: the Fan and the Cat-O-Luck, which can be acquired after rescuing the Toad from the Goombas. The third course, Water's Edge Way, is one of the more memorable levels in this world in my opinion. This stage is the first to have multiple Comet Pieces, Kamek makes his first appearance in battle here, and overall the level is just fun. Hither Thither Hill, the fourth level out of six, is pretty forgettable in my opinion. While it isn't bad, the Toad rescue can be a little bit annoying and the mini-boss is decent. Whammino Mountain holds the first shop outside of Decalburg selling the ever-so-useful Fire and Ice Flowers. The final stage in the first world, the Goomba Fortress, is really great. After Mario makes it all the way around the outer wall and releases the carpet, he can begin his ascent to face the first Chapter Boss of Sticker Star: the Megasparkle Goomba. This fight is challenging without abusing Things, and, I think we can all agree that the music is the most dang slappin' jam ever made (that made no sense). After the game's first true boss is bested and the red Royal Sticker acquired, the chapter comes to a close. This first chapter got me hooked on the game, but mostly because I knew that more interesting chapters would be coming next. Each level here is "good" but none are really "fantastico."
#4 - Chapter 4
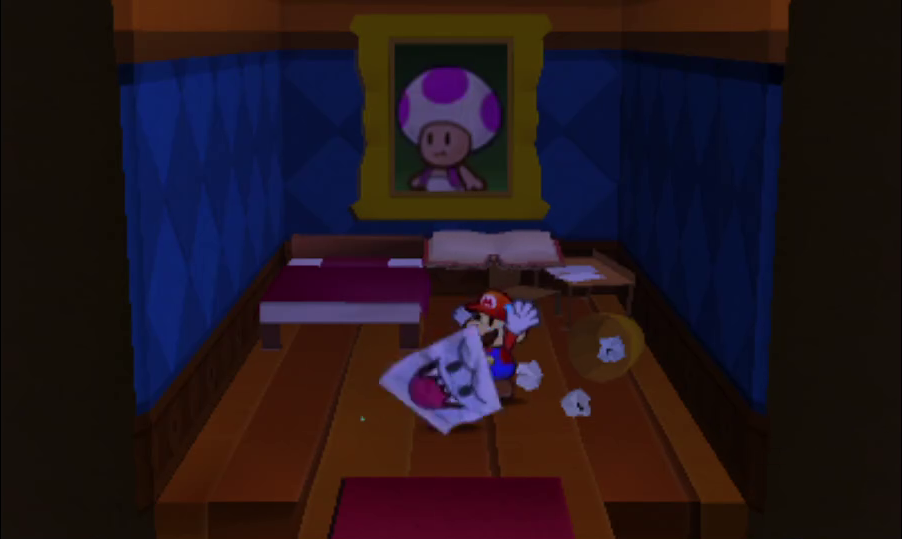
Chapter 4 is a great chapter. I just don't find it as fun as the remaining three chapters. This is the first of three worlds that can only be accessed after defeating the Big Cheep Cheep in Surfshine Harbor. The tundra contains six levels, and similarly to the desert world, one of these is kind of like a town. The first level here is basic, but the cheerful music and the abundance of shiny stickers just makes you feel good. The two Comet Pieces lead to the second level and the fifth, but without a certain scrap, the latter level cannot be progressed through. 4-2, Ice Flow, has you ascending frozen rivers dodging penguins, which is really weird but also epic. After getting through both frozen rivers, Mario will find this level's Comet Piece. The Enigmansion is one of the coolest levels in this game. This course, which holds an astonishing five Things and the first Infinijump (unless you converted a Flashy Clone Jump via a paperization block in like Chapter 2), has you hunting ghosts and trapping them in the Book of Sealing. Paperization puzzles are abundant and the expansive mansion has plenty of stickers. The secret door holds a big surprise: a shortcut to Decalburg and the unlocking of the Thing Shop. As overpriced as the Things can be, this shop can save lots of time hunting them down. After trapping all one hundred Boos (even though eighty-two are found in the same battle), the Book of Sealing is placed on the altar, and Kamek summons the Big Boo. I honestly don't know how this fight is supposed to go as I killed it in one turn with an Infinijump, but I digress. After un-haunting the mansion, the steward allows Mario to take the Forebear's Portrait, the requirement to enter the chairlift in 4-5. Shaved Ice Cave, the course unlocked by the Enigmansion's Comet Piece, is just a sticker shop, but it is the first to sell shiny stickers, even holding the Flashy and Big Shiny Clone Jump stickers (although at a pretty hefty price). The penultimate level of Chapter 4 is Whiteout Valley, which holds an enemy-ridden chairlift that leads all the way up to the Comet Piece. This level is pretty chill (no pun intended), but without proper timing you could be facing many Fuzzies and Paragoombas. The final stage, Bowser's Snow Fort, is awesome. The Toad Rescue mission is difficult and the minecart ride is fun. Another great part of this level is that, after a twenty-level drought, another Megaflash sticker appears (two lie here actually). The boss fight at the end of this course is also one of the best in the game (and the music). In total, I think Chapter 4 is great, but since only two levels stand out, I can't place it any higher than it is.
#3 - Chapter 2
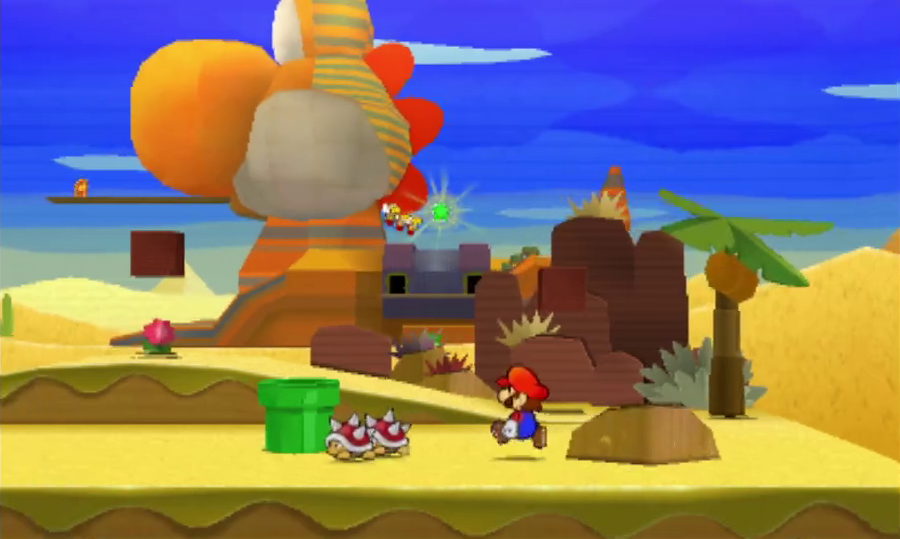
While there are only 4 full levels with enemies in the desert world, each is longer than most levels and they still keep the gameplay fun. Drybake Desert, the first course in Chapter 2, has a secret door requiring various stickers to be paperized onto six slots in order to access the remainder of the course. Also, throughout the world, Mario will be ambushed by Sombrero Guys many times over when engaging another enemy, adding another level of difficulty to random encounters. A river of quicksand lies beyond the cave, which sends Pokeys flying toward Mario. A pyramid lies ahead, which holds many stickers and an HP-Up Heart. The Comet Piece is at the top of the pyramid. The second level, Yoshi Sphinx, is one of my favorites in the game. This level has you climbing an enormous sphinx with enemies and puzzles. The ground floor holds the first of fourteen Megaflash stickers, the Megaflash Hammer. Seriously though, who doesn't want to climb all the way up to the head of Yoshi and fight a mini-boss on his tongue? Kamek temporarily turns all of the stickers in your Album into sandals, making the fight more difficult and unique. The Sandshifter Ruins, 2-3, is also, like the other levels in this world, pretty unique. This one has you sliding through tunnels of sand to find sarcophagi with treasure. This course was also the only one to give me a death outside when I fought the Gooper Blooper without a sponge and my four deaths against the danged Big Cheep Chomp. Two pieces of the Sticker Comet reside here, each with a different path and different puzzles. The Damp Oasis unlocked via the second Comet Piece is a strange one. Apart from the Thing puzzles with the Vacuum and Faucet, this level has few enemies and not much else. The stage holds the final Tablet Piece required to open the Drybake Stadium and some Shaved Ice, but that's about it. The world's final course is a giant tower with sticker puzzles and murals. While this level is shorter than the others in Chapter 2, it is still fun with its puzzles and harder Mural enemies. The Tower Power Pokey is probably the least unique chapter boss, but I still like it (especially since I bopped it with the Megaflash Hammer for 92). Chapter 2 has great aesthetics, music, battles, and puzzles, which make it one of the best chapters in the game.
#2 - Chapter 5
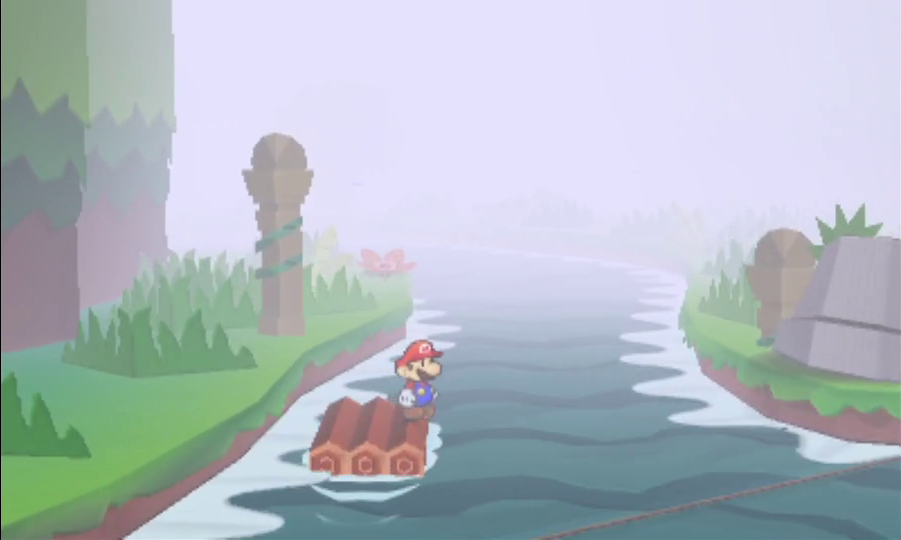
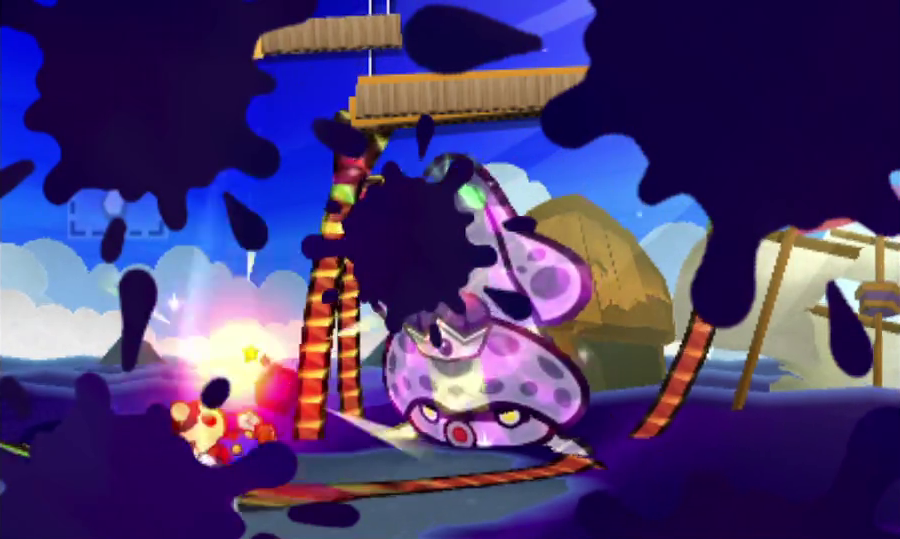
I know some people don't like the jungles of Chapter 5, but I honestly love it. The river levels are very entertaining, the ruins are fun, and the volcano is epic. If you are playing the worlds in order, then this chapter contains the final Royal Sticker needed to open Gate Cliff. The first of six levels, Shy Guy Jungle, requires Mario to find the three bridge scraps needed to reach the Sticker Comet piece. While this level isn't amazing, the music and the new atmosphere makes it feel fun. I've always loved the Jungle Rapids, the second level in this world. While Mario floats down the river, he will dodge obstacles and collect coins until he is attacked by Fish Bones. After getting through these enemies, Mario's raft will crash into the dock at the riverside platform. While the Comet Piece lies just up ahead, the final Toad Rescue mission lies down the long path to the left. The third level, Long Fall Falls, is similar to Jungle Rapids, but instead of collecting coins, Mario has to dodge an enormous Cheep Chomp without getting swallowed for the duration of the float until a waterfall is reached. This course holds what is probably the most overpowered sticker in the game, the Megaflash Infinijump, and two pieces of the Sticker Comet. Chomp Ruins, the fourth level in the world, is a ruins full of Chain Chomps and other enemies. For some reason, Intelligent Systems decided to put three Megaflash stickers in the same room, but hey, I'm not complaining. The puzzles here are really fun and the Chain Chomp "fight" is pretty interesting. Rugged Road, the fifth level of six, allows you to convert the fiery landscape into a snowy one via a Thing such as the Shaved Ice. This course contains difficult enemies, three Megaflash stickers, and the final Luigi Location. There are more Paperization puzzles than most levels here, too. The final stage, Rumble Volcano, is unique and fun. Kersti is taken away at the beginning of the level, removing the Battle Spinner and Paperization abilities. With five floors, a sticker shop selling Flashy stickers for cheap, and a bunch of Chain Chomps, this level is pretty darn epic. While the Petey Piranha fight is one of my least favorite boss fights in the game, it isn't bad by any stretch of the imagination. After collecting the green Royal Sticker, Mario and Kersti can now prepare themselves for the final showdown with Sin— I mean, Bowser.
#1 - Chapter 3
Warning: I accidentally made this section way too long. Don't read it if you aren't interested.
This Chapter has by far the most courses, at 12, which is double the second highest amount! While technically accessible at the start of the game, the Trumpet Thing from the Goomba Fortress is actually required to proceed past the sleeping Wiggler in the first level. I really like this chapter as each level is fun and (mostly) unique, and the boss fight is probably the best chapter boss in the game. Almost every single level has multiple pieces of the Sticker Comet, and revists often involve solving puzzles in order to reveal another path. A main theme of this chapter is trying to reassemble Wiggler and collect the Wiggler Diary Entries, a challenge necessary to reach the world's final area. The first level, Leaflitter Path, has you jumping on moving platforms and making it across puddles of poison. New and more difficult enemies, such as Shy Guys, Ninjis, and Boomerang Bros are also prevalent. This world's second stage, the Bafflewood, is reminiscent of the Lost Woods found in Zelda games: there are multiple paths but only one or a couple of them actually lead anywhere. This stage houses a heck ton of stickers, and like ten Paperization blocks which can be helpful for revisits when you're trying to get your hands on that pesky Flashy Hurlhammer or other rare sticker. The Bafflewood requires a revisit when a Wiggler Segment flees here, and a new path is unlocked leading to the Bowling Ball needed for the bowling section in 3-4. Wiggler's Tree House, the level unlocked from the Comet Piece in the Bafflewood, is kind of like a hub for the chapter: three Comet Pieces reside here which can be accessed to unlock new levels after the corresponding Tree Stump scraps are found in various courses. Wiggler's body is also separated into five pieces by Kamek (which is incredibly disturbing now that I'm thinking about it). After collecting the Comet Piece available from the start, Strike Lane opens up. Mario's first visit to this course is rather uneventful, as without the Bowling Ball, one piece of the Sticker Comet is inaccessible. However, the first of the Wiggler Segments tries to hide here, but eventually flees after Mario tries to capture it. The first Comet Piece unlocks World 3-5, while the other unlocks 3-11. Loop Loop River, the fifth level, can be pretty annoying, but that doesn't mean it is bad. Mario can finally reach the Wiggler Segment from the previous level, and there are two paths out of here. One just redirects to the Bafflewood, while the other leads to Outlook Point. Speaking of that level, it contains a shop and a secondary Sling-A-Thing platform. While there are no encounters, this level is vital because the shops sell some important stickers. The first is the Secret Door, which can be used in practically every level to reveal a Thing or some flashy stickers. The only time the sticker is actually required, however, is right here in Outlook Point. The hidden cave holds the Fishhook, a Thing required in the battle against the Big Cheep Cheep. The other vital stickers at the 3-6 shop are the Big Shiny stickers. While they take up more space, the cheap cost at 25 coins and the effectiveness make them great to have when going up against a difficult enemy.
Man, this segment is getting really long, and I'm only halfway done. Rustle Burrow, the course unlocked after getting the Comet Piece atop the second stump in Wiggler's Tree House, is another very unique one. Upon entrance, a Wiggler Segment falls into a deep pit. Since Mario needs to collect every Segment, he jumps in. When he lands, Kersti, his stickers, and his hammer are all gone. The stickers are scattered all throughout the location, and the Hammer and Kersti can only be found after defeating a bunch of Scuttlebugs. I really like this level because it has a great concept. Tree Branch Trail, unlocked via the Comet Piece in Rustle Burrow, is similar to other levels except for the fact that Mario can climb trees and walk along branches. A Wiggler Segment and Tree Stump scrap are also found here. After reaching the third and final Comet Piece in Wiggler's Tree House, the ninth level, Gauntlet Pond is unlocked. This level is similar to the first in the chapter but with a heck ton more poison. The next level, Stump Glade, puts Mario into a quiz show in order to rescue a Wiggler Segment. Mario must play a Q&A game, a Whack-A-Mole-esque minigame, and a "shell game." After completing these rounds, Mario has an opportunity to play another minigame for a Radiator Thing, which is a mix between the first two. Collect the Comet Piece, which leads back to Rustle Burrow, which may seem like a dead end, but it is not. Return to the Bafflewood to access another area and find the Bowling Ball needed in 3-4 to reach the Comet Piece leading to Holey Thicket, the penultimate course of the third world. This level may be the most generic out of the twelve, as it is just like other levels but with less poison. After collecting the Comet Piece, the final level, Whitecap Beach, is finally available. Since he can't cross the water himself, Mario reassembles Wiggler and is taken to the source of all the poison, an island off the coast of Whitecap Beach. This stage has Mario jumping across poison and shipwrecks until he reaches the boss: Gooper Blooper. This boss has an epic fight theme that progressively gets even more suspenseful, and it's hard as heck without the Sponge, which makes it pretty easy. After defeating the beast, the purple Royal Sticker is dropped and the forest cleansed. Some previously unobtainable items are now available to be found. I'm sorry I didn't explain as much about the second half of the levels, but this section alone is like the same length as the first three. Overall, Chapter 3 is the most fun to me with all the twists, turns, and Comet Pieces.
Leave any feedback and suggestions for future articles below in the comments section!